Although this seems like a crust that would work best with savory pies, or – at the very least – fruit pies, I’ve found it to be quite versatile. It worked very well as the crust for my Mile High Chocolate Silk Pie.
ingredients.
- 1 ¼ c. all-purpose flour, plus extra for rolling
- ½ tsp. salt
- 1 ½ tsp. sugar
- 8 T. (1 stick) unsalted butter, very-cold, cut into ½ inch cubes
- 3 to 4 T. ice water, very cold
directions.
- Cut up a stick of butter into small cubes, about half an inch, and put into the freezer. Freeze the butter at least 15 minutes. The longer the better. Overnight is best.
- Place the flour, salt and sugar into a food processor and pulse until well combined. Add half of the butter cubes and pulse 6 to 8 times. Then add the other half of the butter cubes and pulse 6 to 8 more times. You should have a mixture that resembles a coarse meal, with many butter pieces the size of peas.
- Add a couple of tablespoons of ice-cold water to the food processor bowl and pulse a couple of times. (To get the water really cold I put it in a cup in the freezer when I’m just starting to prepare the dough.) Then add more water, slowly, about a tablespoon at a time, pulsing after each addition, until the mixture just barely begins to come together. If you pinch some of the crumbly dough and it holds together, it’s ready. If not, add a little more water and pulse again. Note: Too much water will make your crust tough.
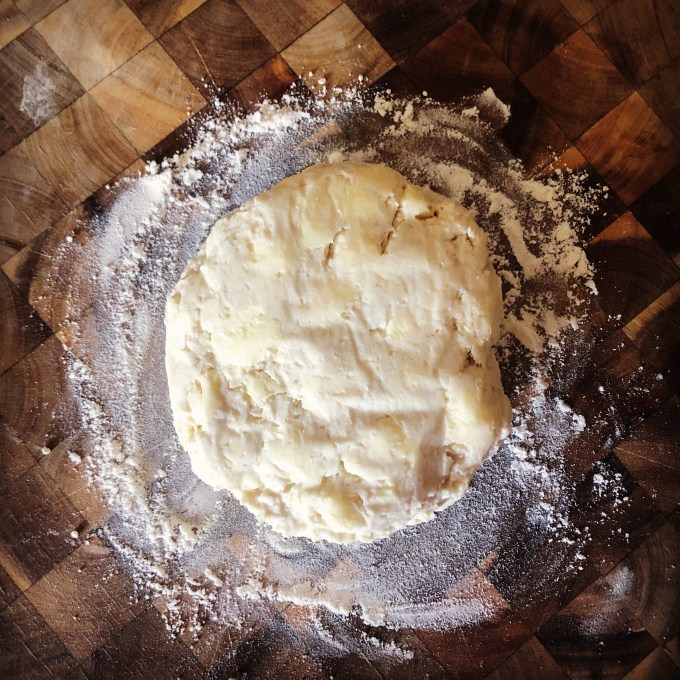
- Remove the crumbly mixture from the food processor and place on a very clean, smooth surface. Press the heel of your palm into the mixture, pressing down and mushing the mixture into the table top. Do this 4 to 6 times to help your crust get extra flaky. Then press the crumbly dough together and shape into a disc. Work the dough only enough to just bring the dough together. Do not over-knead. You should be able to see little bits of butter peppered in the dough. When these bits of butter melt as the crust cooks, the butter will help separate the dough into flaky layers. Visible pieces of butter are what you are actually aiming for.
- Sprinkle the disc with a little flour on all sides. Wrap the disc in plastic wrap and refrigerate at least 1 hour.
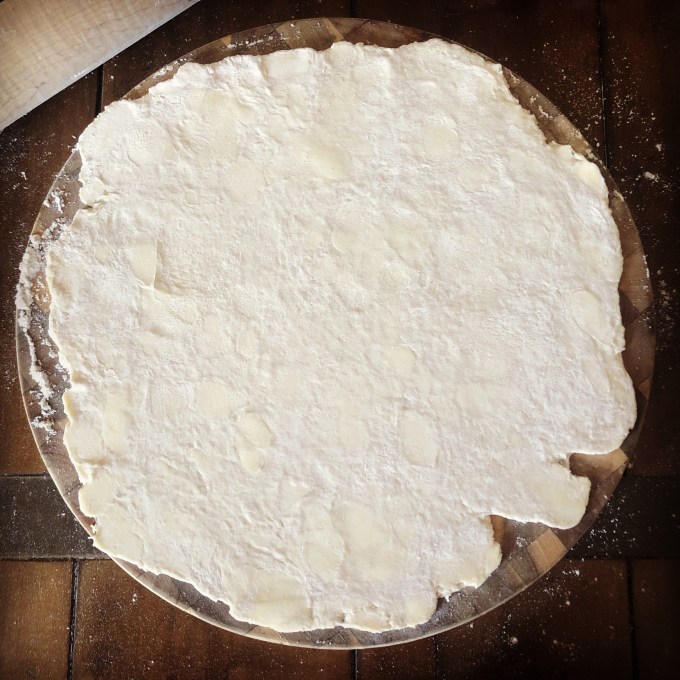
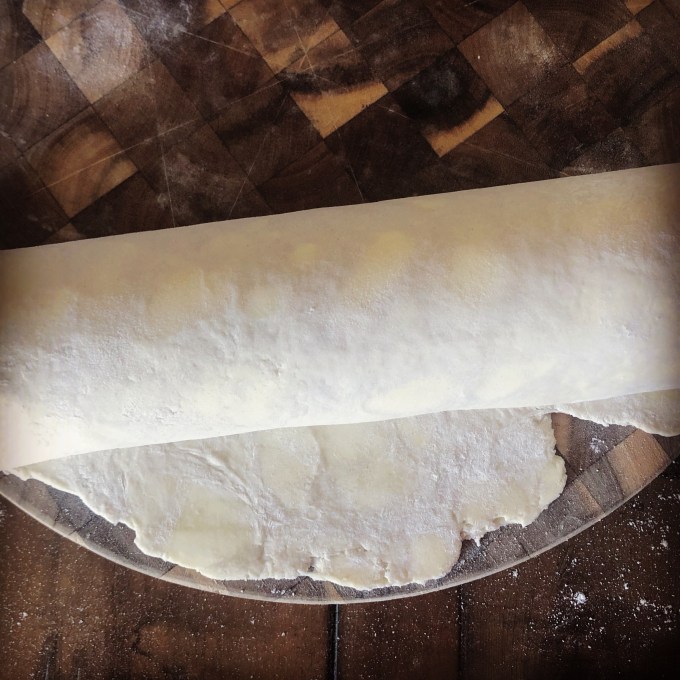
- When you are ready to roll out the dough, remove the disk from the refrigerator and place on a clean, smooth, lightly floured surface. Let it sit for 5 to 10 minutes to take just enough of a chill off of it so that it becomes easier to roll out. Sprinkle some flour on top of the disk. Using a rolling-pin, roll out the dough to a 12 inch circle, to a thickness of about 1/8 of an inch thick. As you roll out the dough, check if the dough is sticking to the surface below. Add a few sprinkles of flour if necessary to keep the dough from sticking.
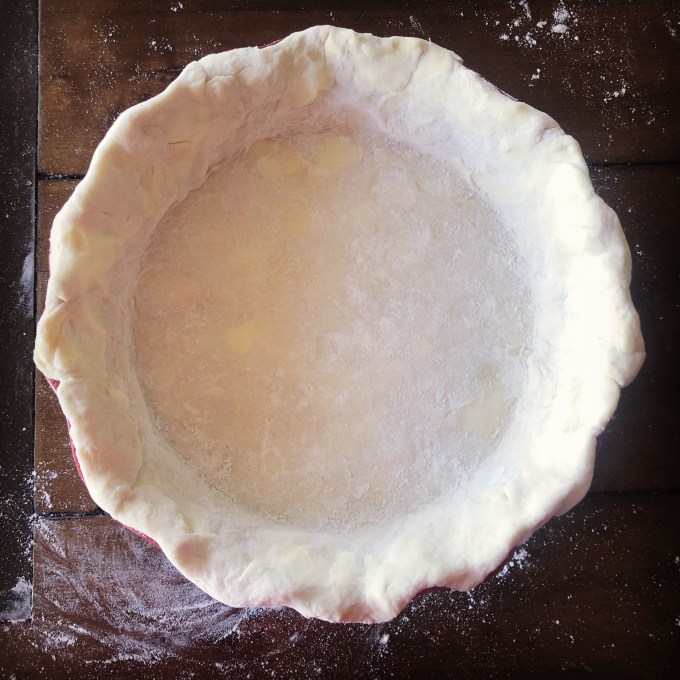
- Place on to a 9-inch pie plate, lining up the fold with the center of the pan.
- Gently unfold and press down to line the pie dish with the dough. If baking your crust, trim and flute the edges.
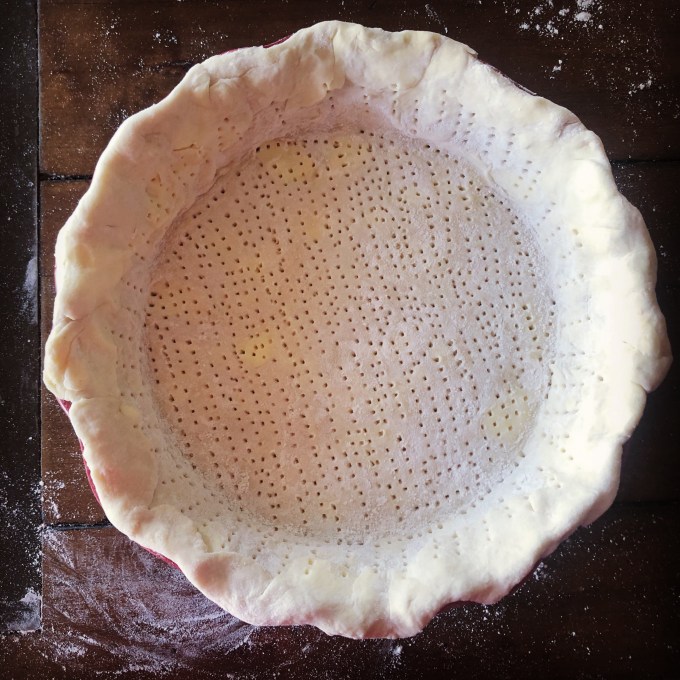
- Also if baking your crust: Preheat the oven to 425 degrees. Prick the prepared pie shell with a fork in a rapid motion all over the bottom and sides, approximately 100 times. (This prevents the pie shell from puffing while it bakes.)
- Press two layers of tin-foil into the bottom and sides of the pie shell so that the pie retains its shape.
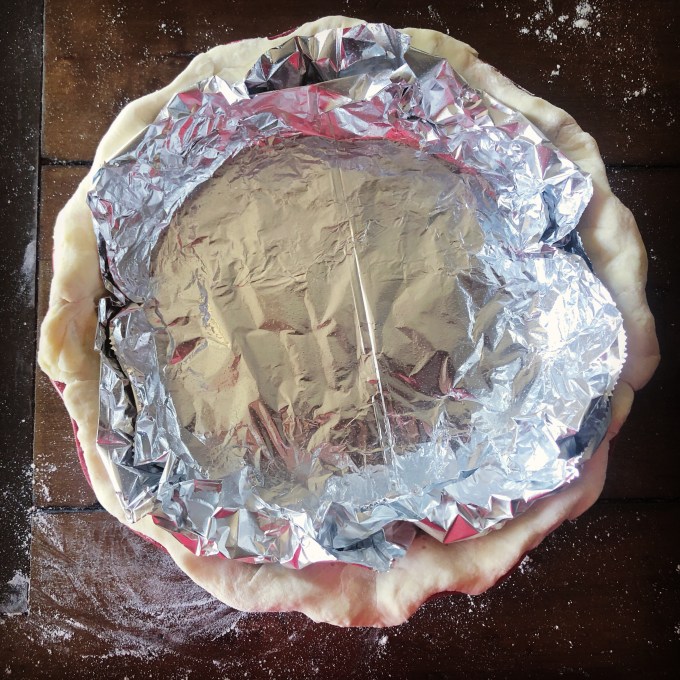
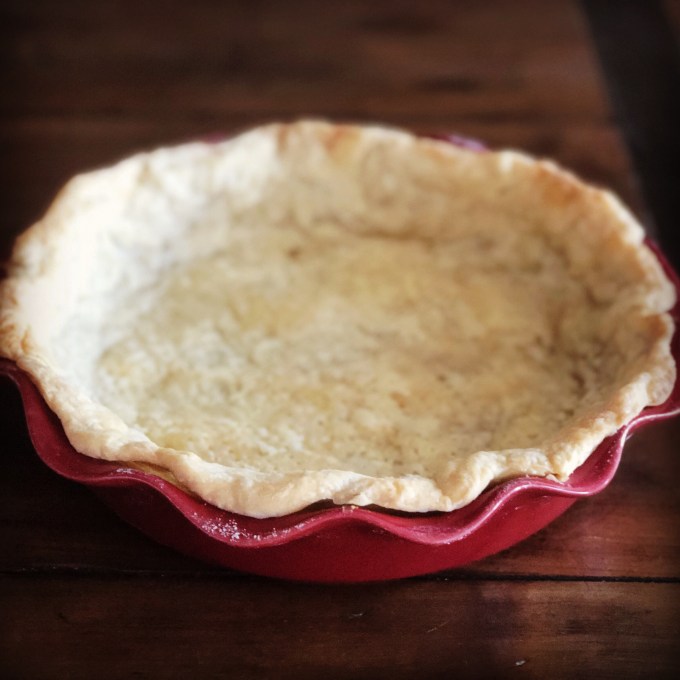
- Bake about 8 minutes, until the edges of the dough are beginning to look dry. Remove the foil and bake 6 to 10 minutes longer. The pie shell is done when the dough is light brown and looks crisp. Set aside to cool before filling.
I’ve found that although it’s way easier to mix your dough in a food processor, it’s also very easy to over process your dough and end up with no pea-sized bits of butter (which is what happened to me the second time I tried this technique). So although it’s a complete pain in the ass, I would recommend cutting the butter into the flour mixture by hand either with two knives or a pastry cutter.
If you’re going to use this crust for a creme based pie – or any other pie that requires that you cook the crust prior to assembling the pie, you want to make sure that your pie doesn’t shrink or sag down in the dish as it bakes. That happened to me! I had to pull it out of the oven and squish the pie back up against the sides. I would recommend making sure that your pie dough hangs over the lip of your pie pan if you’re pre-baking your crust.
To get the top of my crust a little brown, I brushed the dough with whipping cream before baking.
Recipe rating:


