For many years it was tradition on my birthday that my mom would make red velvet cake. It was hands down the best cake ever. And, if I must confess, it got to the point somewhere in my twenties where she would actually make me two cakes. One for me to share with everyone and one for me to eat. I would eat red velvet cake (and ice cream!) for breakfast, lunch and dinner days after my birthday until I had none left. I was probably at least 10 or 15 pounds heavier back in those days. No wonder, huh?

Then when I moved across the country it was up to me to make my own red velvet birthday cake. Which I did for a while. But I haven’t kept up on the tradition in years. There was a period of time when I started doing cake week for my birthday. I would make a different cake for each day of the work week. It gave me an excuse to try different cakes and/or fit in that red velvet cake that I loved so much. I did that for two years before I moved again. I stopped cake week because at my new job my department was very small and my coworkers seemed less cake-happy than my coworkers of the past. Don’t get me wrong. They love cake. They especially love my cakes. But I think cake week would be a bit overwhelming for them.
Still, I made my own cake for my birthday and brought into work the first year (and plan to do so again this year). But I also make birthday cakes every year for my coworkers. My manager’s birthday is at the end of June, approximately two weeks before mine, and (two years in a row now) when I asked for her flavor request she requested red velvet with cream cheese frosting.
So here’s what. I’m not a fan of cream cheese frosting. Not the butter cream variety anyway. It’s too sweet. And too cream cheesy. So whenever anyone would ask me for a cake that traditionally comes with a cream cheese frosting (red velvet or carrot cake, namely), I would cringe inside knowing the cake recipient would expect cream cheese frosting. Then I found a gem of a recipe for cooked cream cheese frosting that was basically a game-changer. I don’t know why but this frosting is so much better to me. It’s less sweet. The consistency is silkier. It’s less cream cheesy but still comes across as having a cream cheese flavor to which, oddly, I’m not opposed!
I tried this recipe for red velvet cake from the Portuguese Girl Cooks on a whim once instead of using my mom’s tried and true Red Velvet Cake recipe and have found this recipe to be a an all-around winner. I can’t believe I haven’t blogged this recipe yet – especially because I made it last Christmas for my then-boyfriend’s family Christmas. Since my manager’s birthday was last weekend, and she again requested red velvet, I figured it was time to blog this red velvet cake.
red velvet cake ingredients.
- 4 ¾ + ⅛ c. all-purpose flour
- 1 ½ tsp.salt
- 18 T. butter, at room temperature
- 3 c. granulated sugar
- 3 large eggs, room temperature
- 6 T. red gel food color (no taste)
- 1 ½ tsp. pure vanilla extract
- 3 ¾ T. natural cocoa powder, sifted
- 2 ¼ c. butter milk or whole milk, at room temperature
- 2 ¼ tsp. baking soda
- 2 ¼ tsp. apple cider vinegar (when using whole milk)
red velvet cake directions.
- Preheat oven to 350 degrees F. Grease three 8-inch cake pans and line the bottom of each with parchment paper. Grease the parchment paper and sides of the pans. Throw some flour in each pan and shake the pans around until the pans are coated in flour. Tap to get rid of excess flour.
- In a small bowl, whisk flour, cocoa powder, salt (and baking soda if using buttermilk) together. Set aside.
- In a stand mixer fitted with the paddle attachment, combine the butter and the sugar together and cream on medium speed until it is light and fluffy, about 3 minutes.
- Add the eggs, one at a time, mixing well after each addition. Add in vanilla and food coloring. Mix on low until well combined.
- Add in one-third of the flour mixture, mix until combined, then add in one third of the milk. Mix until combined and repeat adding in the flour then milk, scraping down the sides of the bowl after each addition.
- Omit this step if using buttermilk. In a small bowl, add the baking soda to the vinegar. Mix well and add to the batter. Mix until just incorporated, about 10 seconds.
- Pour batter into the prepared cake pans. Bake approximately 40 to 50 minutes or until a toothpick inserted in the middle comes out with a few moist cake crumbs stuck to it. Do not over-bake. This cake is easy to over-bake!
cooked cream cheese frosting ingredients.
Frosting recipe adapted from one found at thekitchn.com. Note that you may want to make a bit extra frosting. I ran our of this frosting before finishing the cake! However, I have a heavy hand when it comes to filling the layers.
- 16 oz (2 bars) full-fat cream cheese, softened at room temperature for at least 1 hour
- 8 oz (two sticks) butter, softened to room temperature or near room temperature
- ½ c. all-purpose flour
- 2 T. corn starch
- 2 c. white sugar
- ½ tsp. salt
- 2 c. whole milk
- 2 tsp. vanilla
cooked cream cheese frosting directions.
- Whisk the flour, sugar, corn starch and salt together in a small saucepan. Turn the heat on to medium and slowly add the milk, whisking constantly. It will look lumpy at first but whisk vigorously to create a smooth paste. Continue whisking as the mixture comes up to a simmer. It will thicken rapidly and dramatically as it comes to a boil . Simmer for 1 full minute, then turn off the heat. Scrape the flour and milk paste into the mixer bowl. (If you want to be 100% sure there are no small lumps, pour it through a mesh sieve.) Chill completely.
- Once the flour-milk mixture has completely cooled, turn on the mixer or beaters and whip the flour-milk mixture until it is lightened in color. Drop in the butter and cream cheese. I dropped in one stick/brick at a time and then beat completely until moving on to the next stick/brick. Add the vanilla. Continue whipping until the the two are completely combined and smooth and silky. The texture of your frosting should be thick.
- Let the frosting firm up a bit more by refrigerating for a few hours or overnight before filling and frosting the cake.
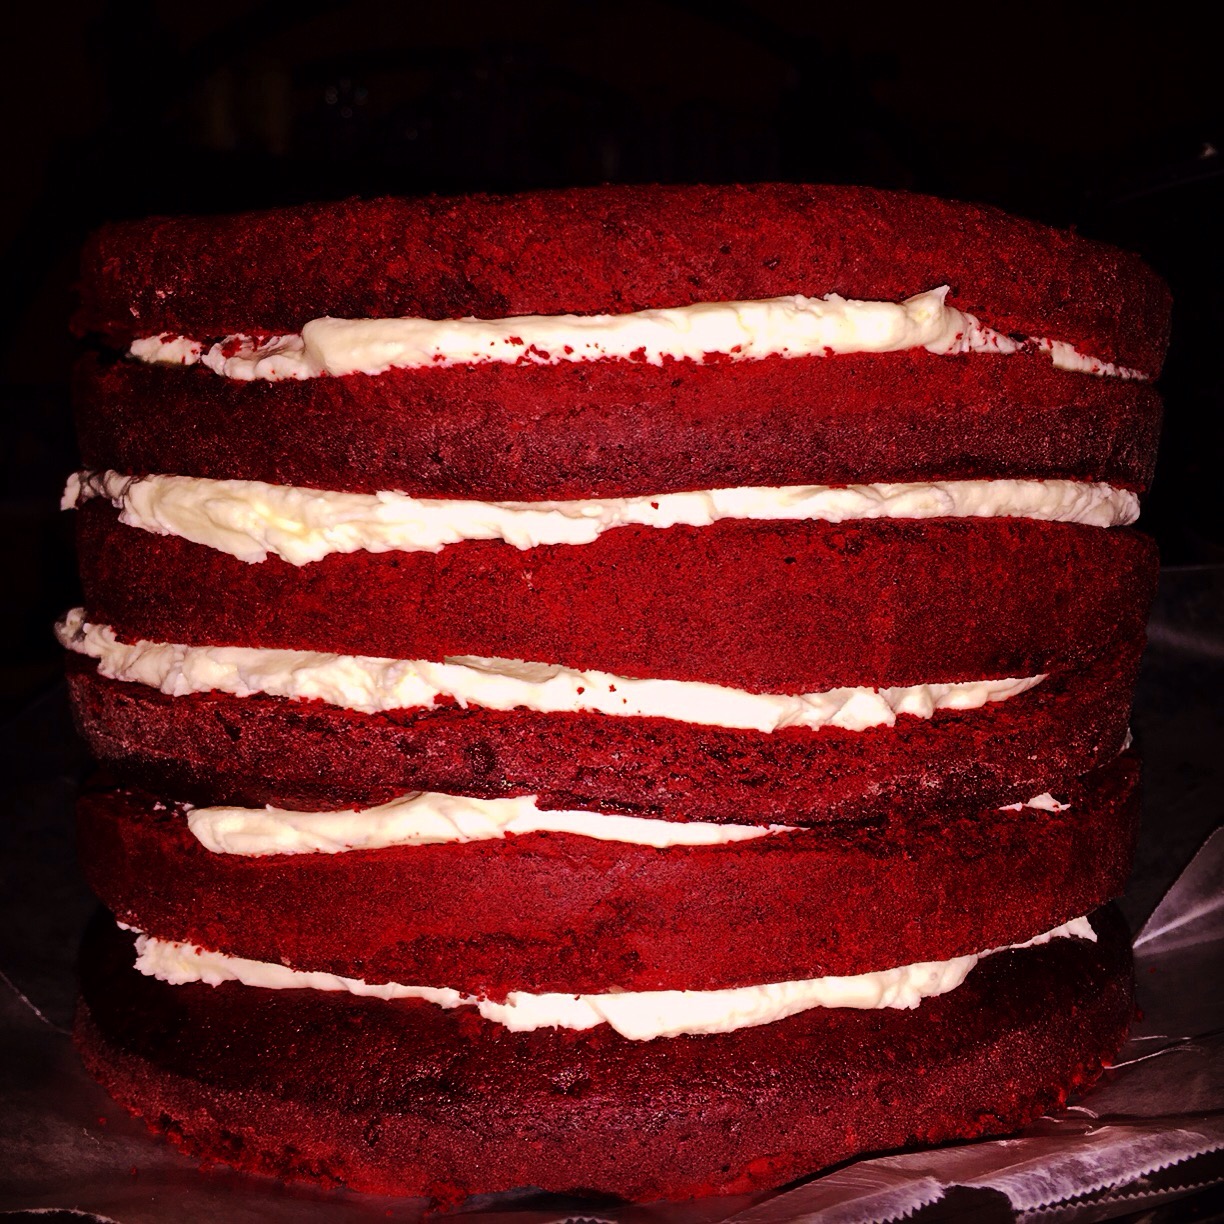
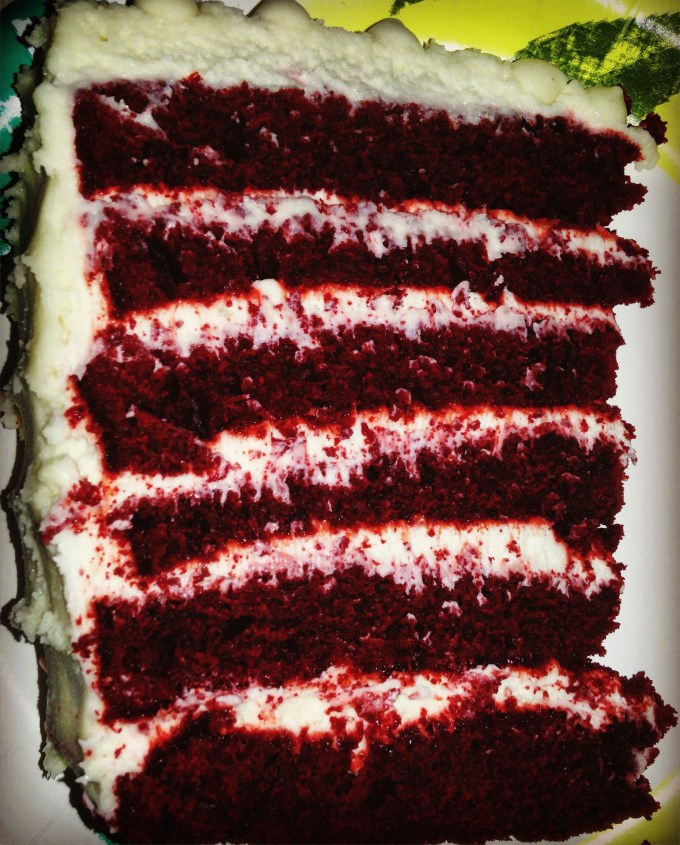
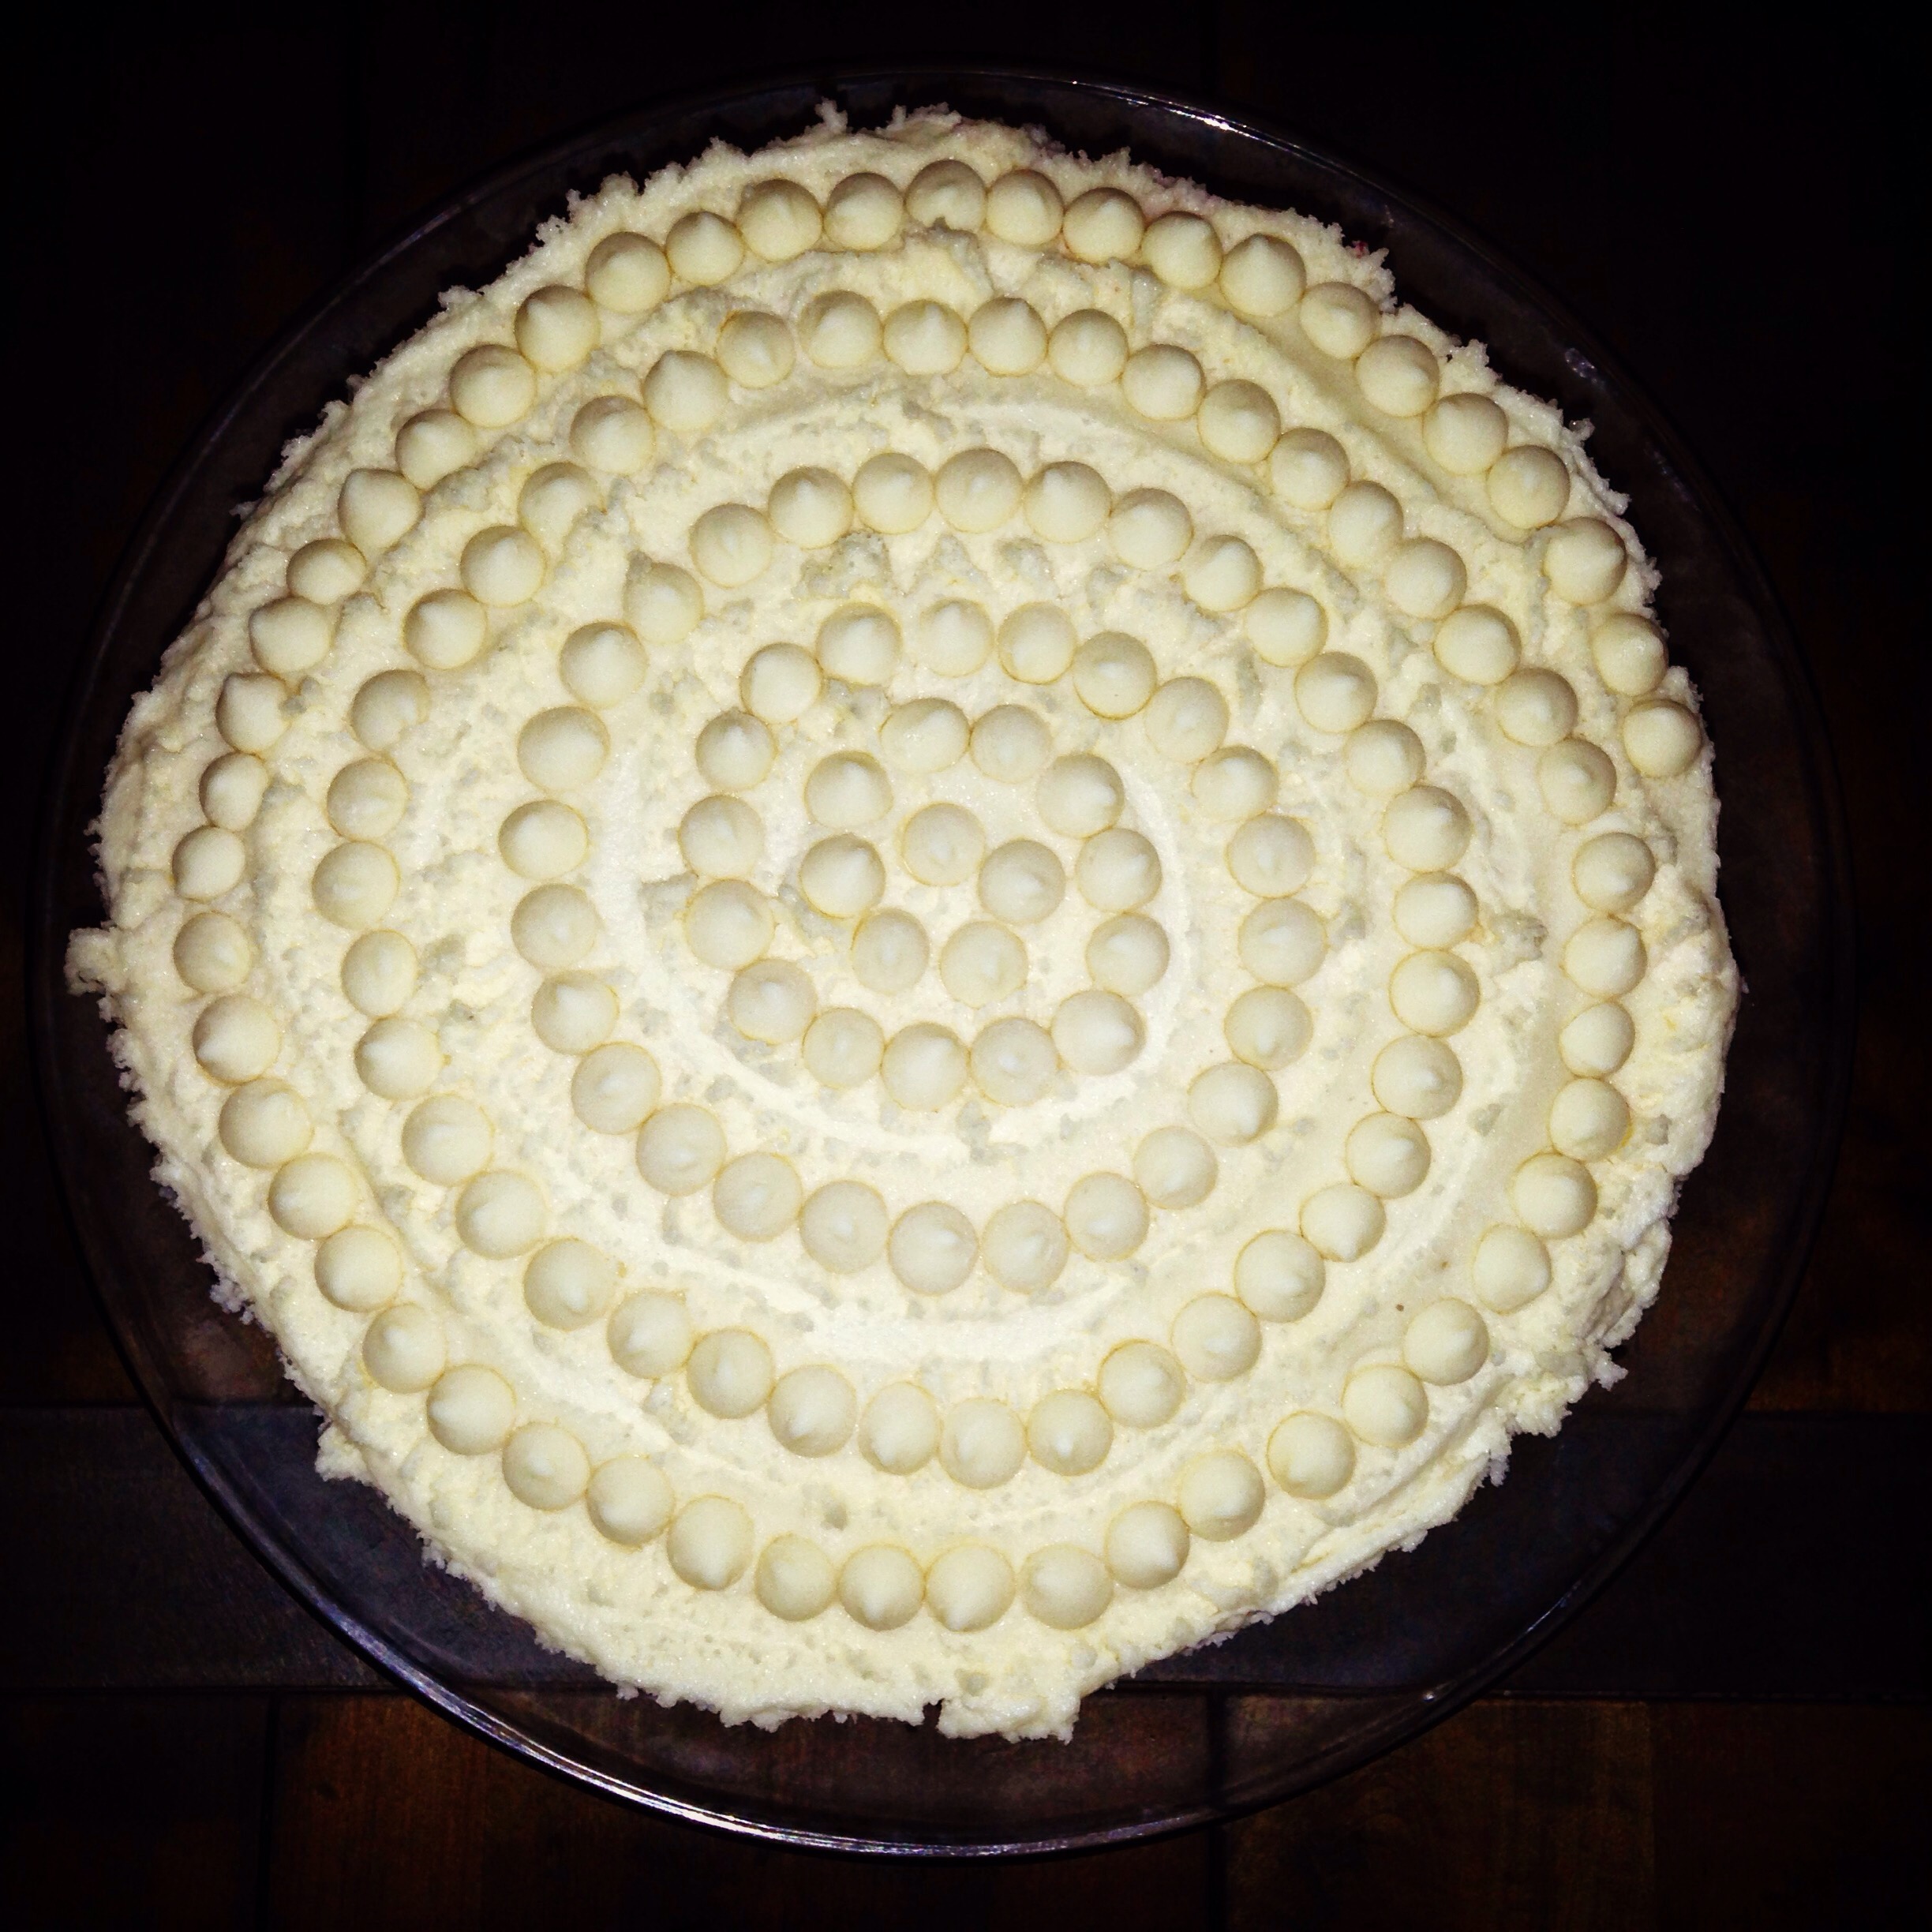
Note: To make a six-layer cake, cut the three layers in half using a serrated knife. I like to freeze my cake layers before doing this and let them thaw slightly. I find it makes less crumbs. Additionally, every time I make this recipe the cakes come out of the oven with a very large dome on top. To make the cake more even, I cut off the domes. Because I hate wasting so much extra cake, I make cake parfaits with the leftover cake domes. I will tell you that I needed to make extra frosting to have enough frosting for the cake parfait!
Recipe rating:

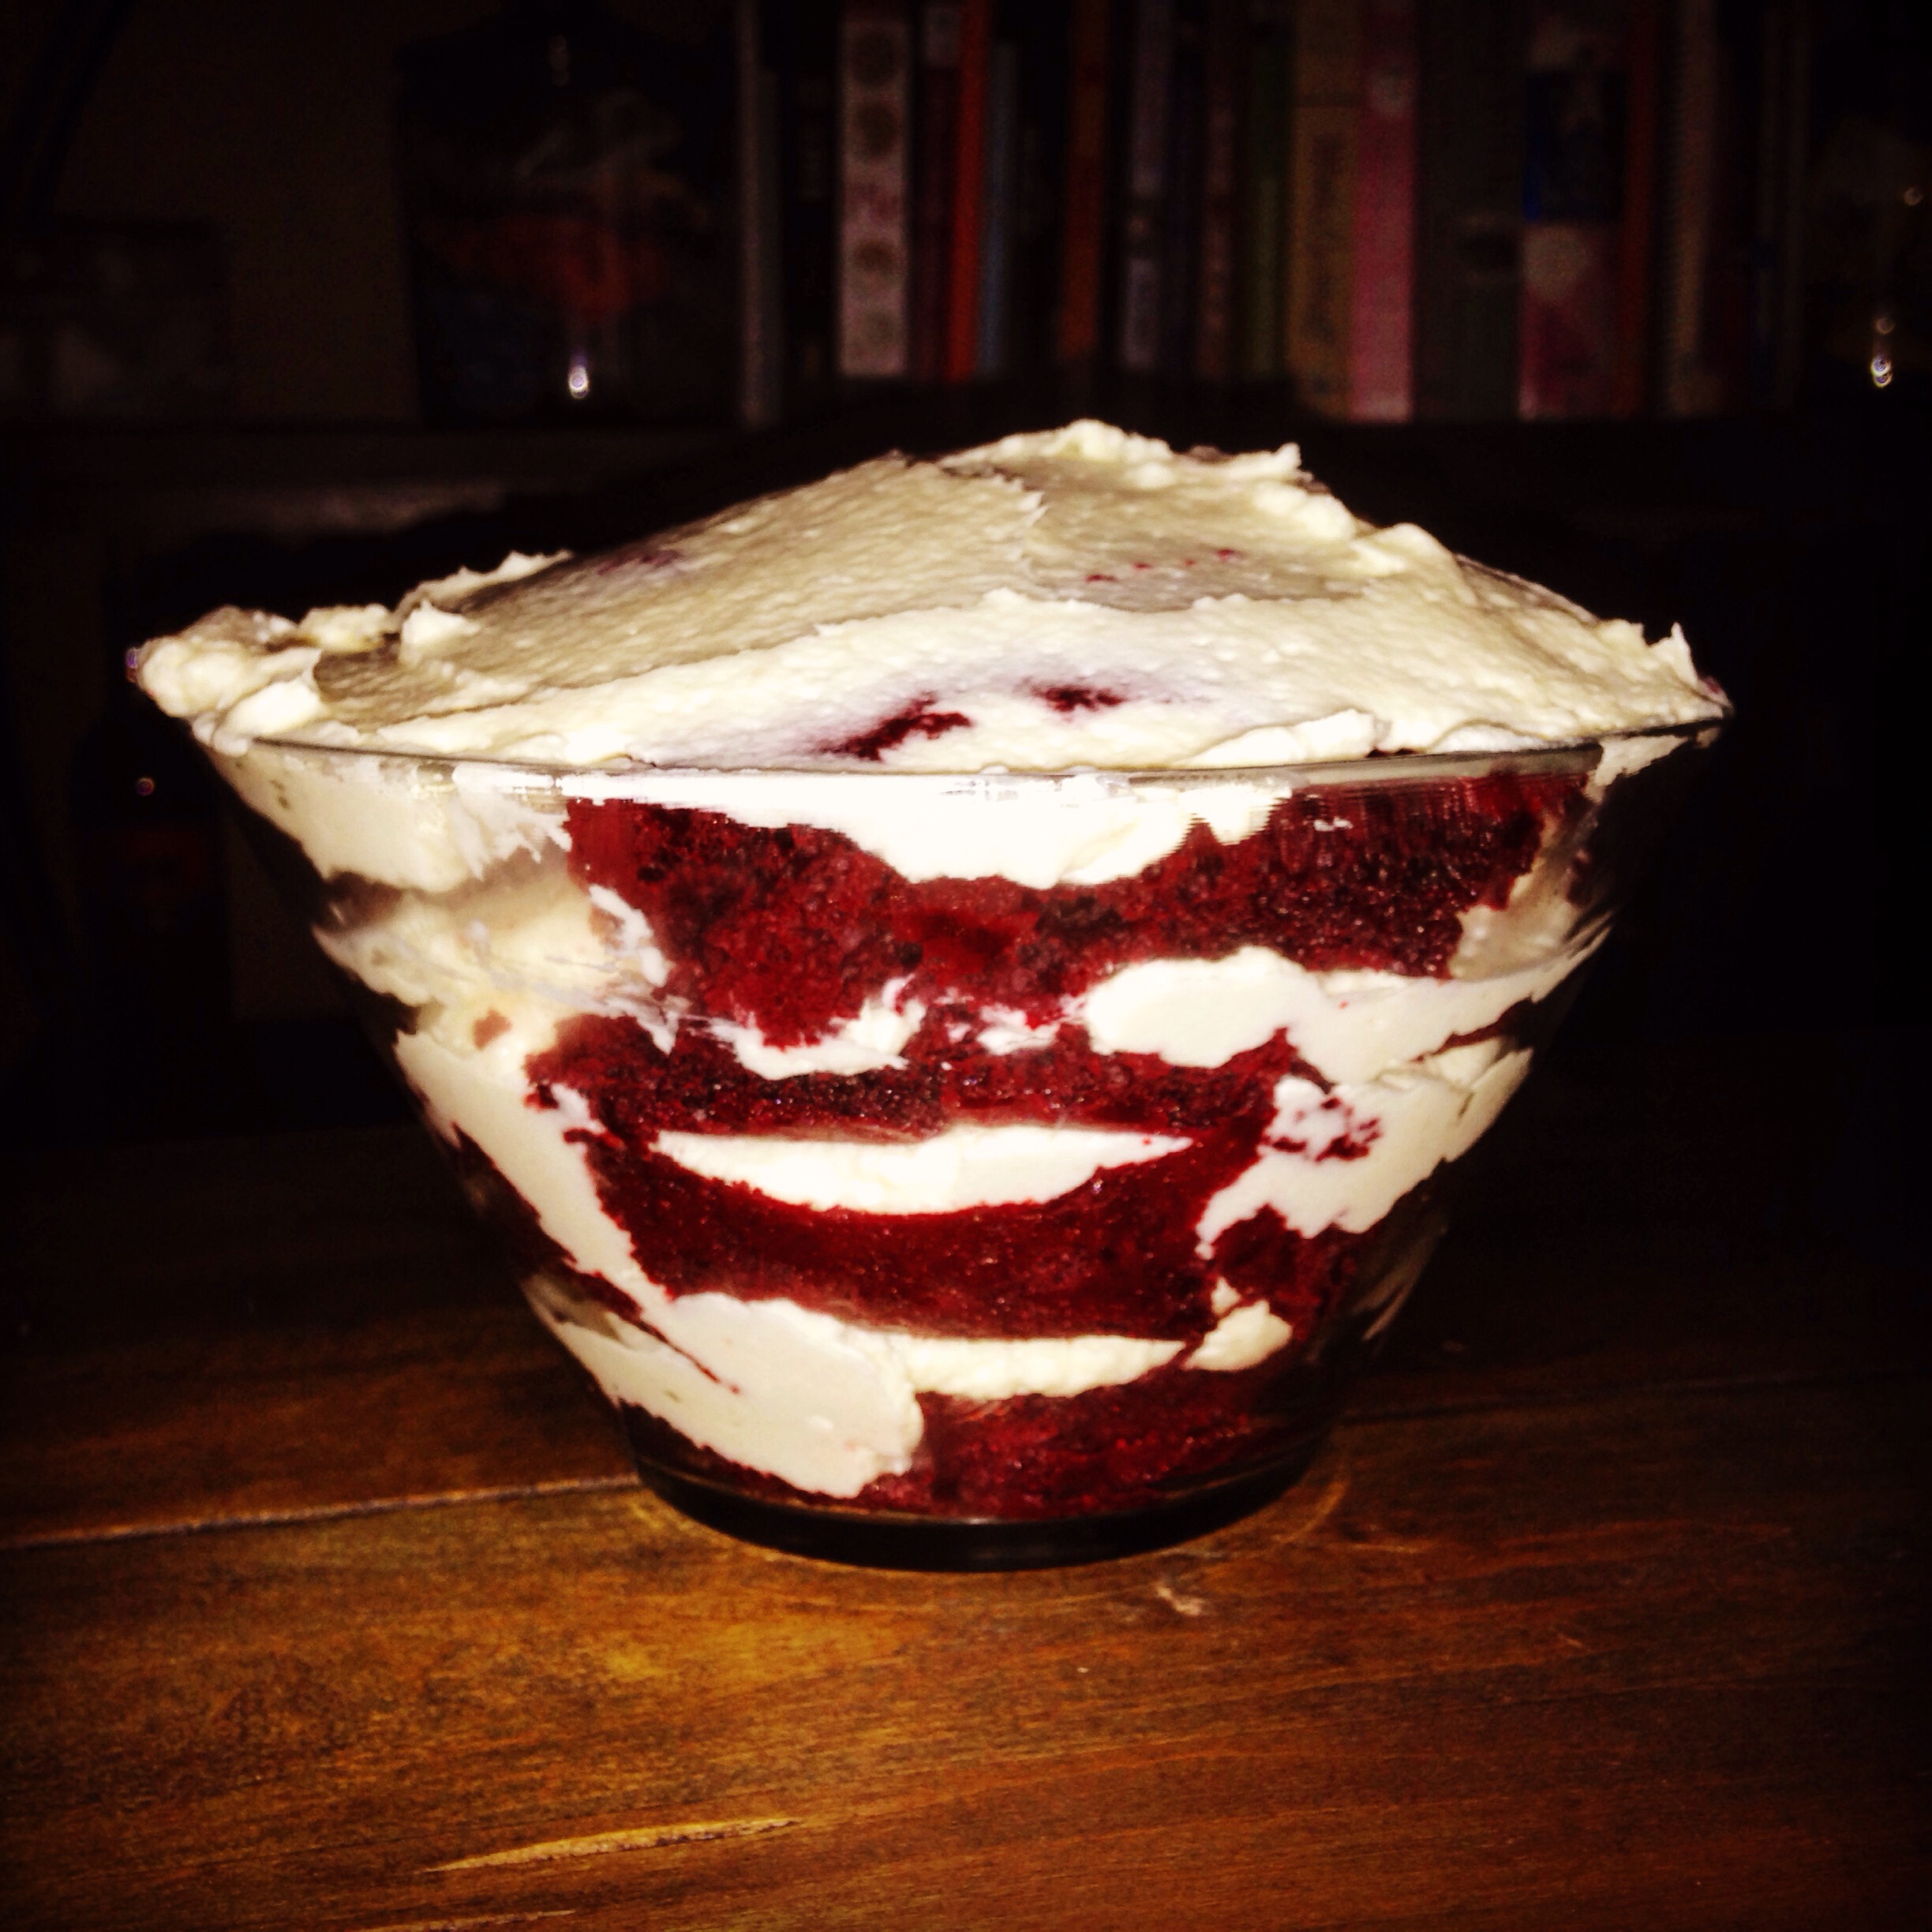 This cake turned out to be one of the better ones I’ve ever made. Why? I’m not sure. I do know that red velvet cake in general can happen to over-bake rather easily. Since I’m cognizant of that, I do my best to not let that happen when I make red velvet cake. This cake was perfectly moist. I ran out of cream cheese frosting and made a double recipe of cooked frosting sans cream cheese (I didn’t have any on hand!) which I used to finish frosting the cake and to make those gems of parfaits you see above.
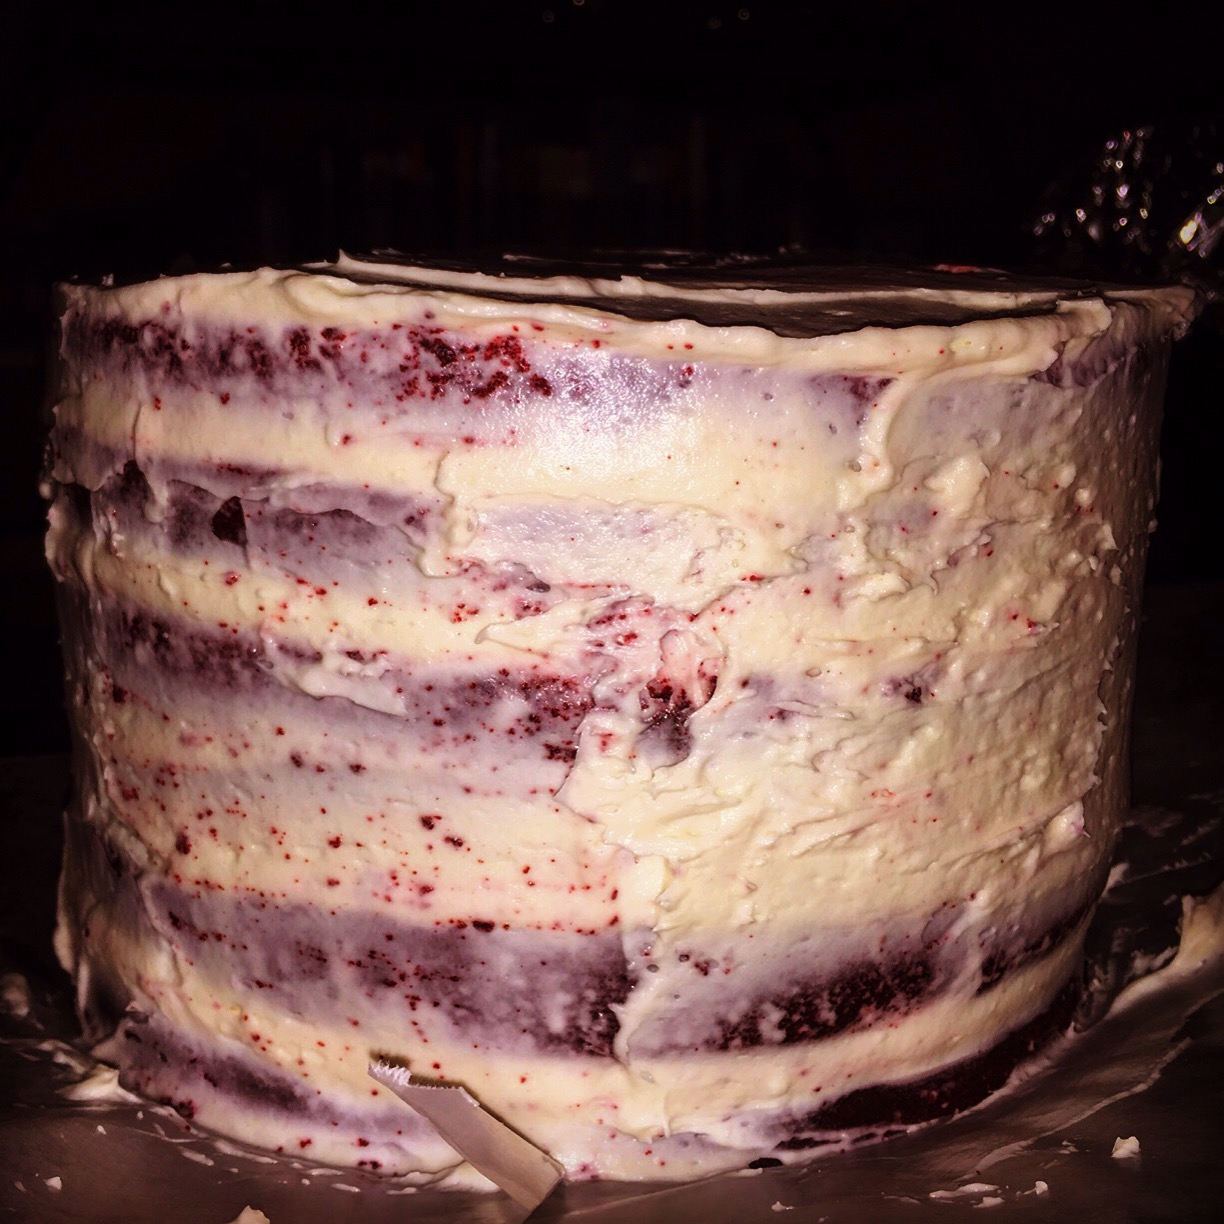
Red velvet cake is hard to frost because the red coloring tends to bleed through. I did a quick crumb layer, chilled the cake, and then coated the cake a second time with a verrrrrrrry thick layer of cooked frosting. Two thinner layers would have worked equally as well.


