What would you do if you had three Costco-sized tubs of dry-roasted peanuts and weren’t someone who munches on peanuts constantly? If you were me, you would look for tons of recipes to use up all those pounds of nuts. Turns out, there are not that many great peanut recipes floating around. I wasn’t looking to make peanut butter cookies or any type of dessert. And although a peanut-y sauce and stir fry always sounds tempting, I don’t always have the necessary ingredients on hand to make a good stir fry.
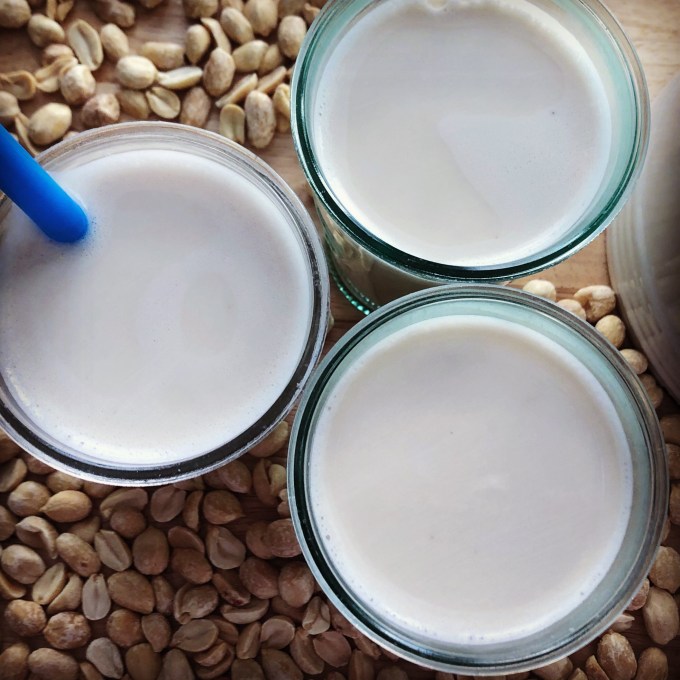
But I discovered that making peanut milk requires only two ingredients if you want an unsweetened drink: peanuts + water. And if you need or want some flavor and sweetness you can add vanilla and pitted dates. How easy is that?
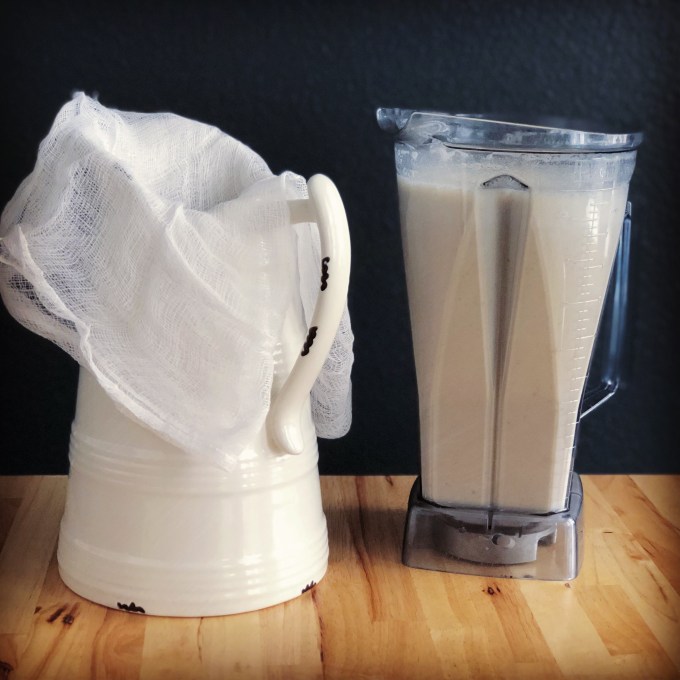
In theory, making nut milk is simple. OK the ingredients list is simple. The process? Not so much. It’s lengthy. You need to soak nuts for several hours or overnight (simple but time consuming), blend them up (quick and simple) and then strain them through some sort of fine mesh sieve (time consuming and tedious).
Here’s what I learned while going through the process aside from the fact that it’s tedious: it’s also messy. Make sure you use big enough squares of cheesecloth or you’ll end up having to regroup and get new cheesecloth. I did. After a few squeezes of the cheesecloth, I found that I had removed a good amount of the ground nuts and the liquid poured through the cloth more easily, but I did have to squeeze the cloth every single time as the ground nuts always built up. I then discarded the ground nuts on the counter top, placed the cheesecloth over the jug again and started the process over again. You have to squeeze gently otherwise bits of ground up nut will push through and you don’t want that.
I wasn’t sure how well I was going to like this milk having no concept of what homemade nut milk tastes like. While I wouldn’t make this milk every day or even every week, I think this is a great recipe if you want to make your own nut milk or have extra nuts lying around. I was surprised to find that the dates lent enough sweetness that I didn’t have to add anything other sweetener to the milk. However, I used 6 dates and it turned out fairly sweet. Three or four dates would be better if you want your milk to be less sweet.
I modeled my recipe after the Almond Eater’s, but did some research on other nut milks as well. This basic recipe will work with other nuts like cashews, almonds, walnuts, etc. I would liken the thickness of this milk to 1% fat (dairy) milk. If you want thicker milk consistency, like whole milk, use less water. If you’d like it thinner, like skim milk, add a bit more water. Be careful not to dilute too much or the mixture will be too watery.
ingredients.
- 2 c. unsalted dry roasted peanuts
- 5 to 6 c. filtered water
- 4 to 6 pitted dates (optional, for sweetness)
- ½ tsp. vanilla extract (optional, for flavor)
- pinch of salt
directions.
- Pour peanuts into a container and then top them with 6 cups of filtered water. Store the container in the refrigerator for 6 hours or overnight to allow the peanuts to soak in the water.
- Once the peanuts have soaked for the appropriate time, dump the peanuts into a strainer and rinse with cold water, discarding the water you used for soaking.
- Place the peanuts into a high-powered blender. Add 5 to 6 cups filtered water, the dates, salt and the vanilla, and blend on high for 1 or 2 minutes or until the dates and peanuts are as pulverized as possible and the mixture is smooth (as possible).
- Place a double layer of cheesecloth or a nut milk bag over a large container or bowl and carefully pour milk into the cheesecloth (or nut milk bag).
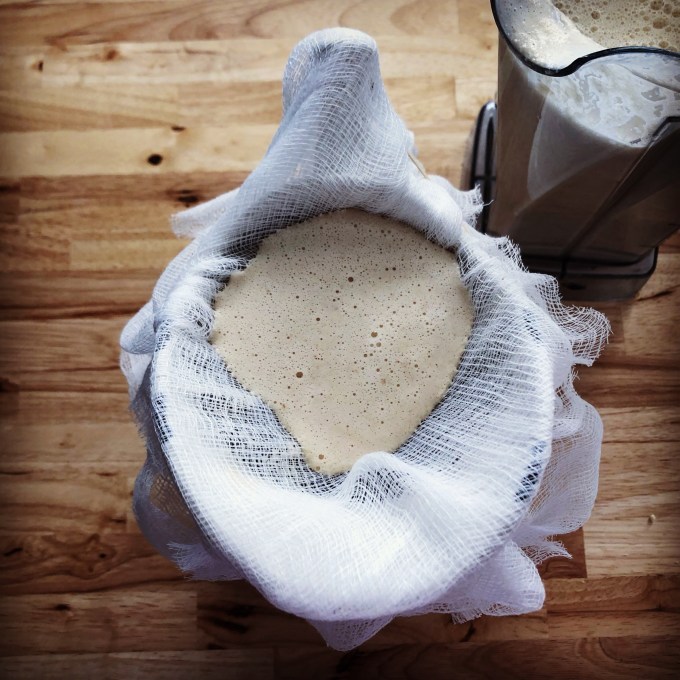
- Use your hands or a rubber band to keep the cloth in place making sure the mixture doesn’t seep over the edges and into the bowl without being strained. Gently twist the cloth so that liquid strains from it, massaging or gently squeezing the sack as necessary. Repeat the process until you have strained all the mixture from the blender.

- Pour the milk into a glass jar or pitcher and store it in the refrigerator for 3 to 4 days. Shake the milk before serving.
As you’ll notice, you will have tons of ground nut mixture leftover when you’re done squeezing your milk. You can toss it or try to repurpose if you don’t like to waste food. Eat it by the spoonful, stir in some oatmeal, spread on toast or find other creative ways to enjoy the mixture.
Recipe rating:


