
I announced to Sis the other day that I wanted to make fermented sourdough bread. She looked at me quizzically and asked me the difference between fermented and regular sourdough bread. I didn’t have any idea. All I knew was that I had heard a server at one of my local fave burger places describe their sourdough bread as really fermented and that I could find recipes for fermented sourdough bread on the internet that promised to be more easily digestible for those who may be intolerant to gluten.
While I’m not gluten intolerant that I’m aware, a doctor recently advised me to remove gluten from my diet for the time being. Gluten is thought to cause and/or worsen inflammation and I’ve been diagnosed with severe inflammation (amongst other things). This is precisely why I wanted to try fermented sourdough bread though I had really no idea what it was.
I found an incredibly complicated recipe for Fermented Sourdough bread at Deliciously Organic that I decided I wanted to loosely follow for my first venture into fermented breads. I say loosely because there were just certain things I couldn’t do. The recipe called for organic flour, both all-purpose and whole wheat. The only thing I have right now is copious amounts of non-organic all-purpose flour and I wasn’t about to add more flour to my already bursting cupboard space.
Also, I always have starter/Levain in my fridge that I feed weekly. I had just fed it the other day so instead of making my own Levain using a starter, I went straight to the second step and used my mixture as the Levain in the recipe.
Since then I’ve made the recipe several more times following it to a T with one exception: I leave the loaves of dough in the fridge for several days (instead of 36 hours) to get a tangier sourdough.
Despite the fact that this recipe appears to be super complicated, I’ve introduced it to my neighbor Cara with much success and Sis with more muted success. It was easy to convince Cara to try the recipe because I gifted her family a loaf of bread and they went gaga over it. She found the recipe daunting, but with some convincing and after I supplied her with a scale and dutch oven, she was ready to give it a try. She had always wanted to make her own bread anyway.
Sis was harder to convince. During a long weekend in Portland I explained to her that I wanted to make a new bread recipe. She opted out of participating when I explained the process but said I could feel free go at it in her kitchen. When she bit into the first loaf I made, she liked it a lot. I asked her if it was good enough to try the complicated recipe on her own and she wouldn’t commit. Several days later when I was back in Long Beach and literally talking on the phone with Cara about the bread (as she embarked on her second time making it), a text came in from Sis saying she had made the second loaf of bread, which had swayed her to want to try the complicated recipe on her own.
Winning!
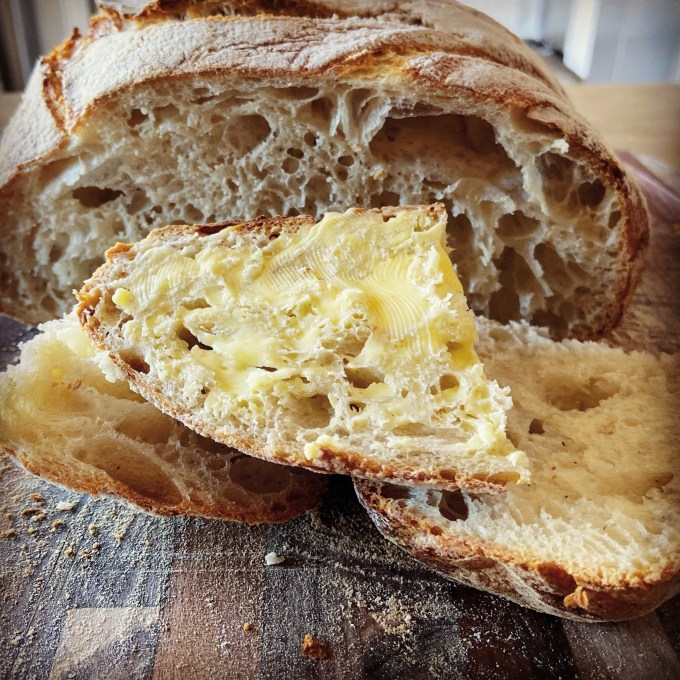
One loaf of bread takes at least 3 days of prep with days one and three being relatively passive. On day 2 you do the most work. You need to have about four hours of time to give to mixing and stretching the dough and letting it sit, you also need 12 hours of letting it sit in the fridge. On day 3 it’s in the fridge for 24 hours to ferment. After that you can make the loaves of bread or wait until you’re ready to have a fresh loaf. Right now, as I write this, I have enough dough in my house to make 4 loaves of bread whenever I need one. Trust me that a loaf of bread is easy to eat, especially if you live with others. It’s also an impressive gift to give. It tastes like artisan bread you would buy at a fancy bakery and probably $5 to $8 for a loaf!
day 1: levain ingredients.
- 25 g mature starter
- 70 g purified/spring water
- 70 g organic all-purpose flour
day 2: dough ingredients.
- 725 + 50 grams purified/spring water
- levain from day 1
- 200 g organic whole wheat flour
- 300 + 500 g organic all-purpose flour , divided
- 25 g Celtic sea salt or Himalayan pink salt
- additional flour for dusting
day 1: levain directions.
- The evening before you make bread, mix together 25 grams starter, 70 grams water and 70 grams flour in a 16oz mason jar or small bowl with straight sides. Mark the level with tape or a rubber band (optional).
- Cover the mixture with a clean towel and leave on the counter at room temperature. The mixture will be ready in to use in 10 to 12 hours and will double or even triple in volume. I’ve let it sit for about 24 hours before using it and it turned out just fine. During summer months when it’s hot out the mixture may be ready to use as quickly as 5 to 8 hours.
day 2: dough directions.
- Pour 725 grams of water into a large glass or ceramic mixing bowl or a plastic bucket. Add the levain and mix to incorporate. The levain should float when you add it to the water. If it doesn’t, you didn’t let it rise long enough.
- Add 200 grams of whole wheat flour and 300 grams of all-purpose flour to the water mixture and combine with a dough whisk or regular whisk. Add the remaining 500 grams of all-purpose flour and mix with your hands, making sure there are no dry clumps of flour.
- Note: The temperature of the water in relation to the ambient room temperature is very important. In the wintertime, it may be helpful to use warmer water and in the hottest months, ice water may be appropriate.
- Cover and autolyse (let sit) for 30 minutes.
- Add 25 grams salt and 50 grams of water and mix by hand until incorporated. The mixture may seem a bit soupy at this point. That texture will change during the stretch and fold stage. Cover the dough with a clean cloth and let rest for 30 minutes.
- Stretch and fold the dough four times. Pick up a chunk of dough from the bottom of the ball of dough, lift it up and tuck it on top. Rotate the bowl one-quarter of the way and repeat. Repeat two more times until you’re back to where you started.
- Place a clean cloth over the dough and let it sit for 30 minutes. Then, stretch and fold the dough again, place a clean cloth over the dough and let sit for another 30 minutes. Repeat two more times for a total of four times.
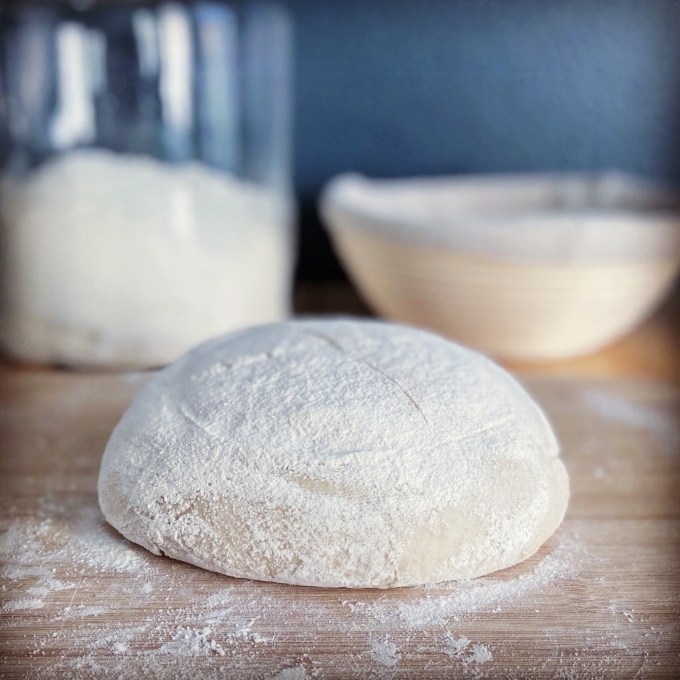
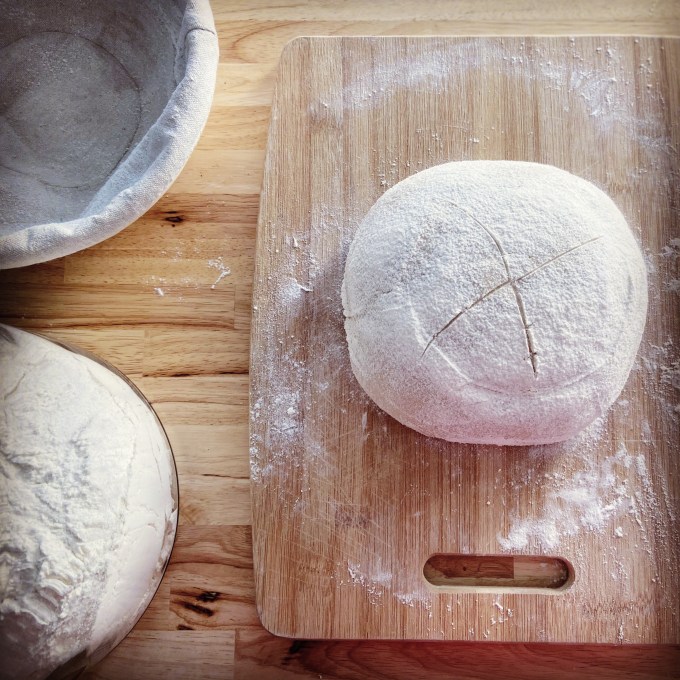
- Lightly dust a wooden board or a clean counter top with flour. Turn the dough out onto the floured surface. The dough will be sticky, so it helps to have wet hands. Using a large chef’s knife or even a pizza cutter, cut the dough in half and make two rounds of dough. Cover with a clean cloth and let sit for another hour.
- Dust two brotforms with flour. If you don’t have a brotform, you can use a basket or bowl lined with a dishtowel (if doing this, make sure to dust the dishtowel with an ample amount of flour). Don’t skimp on the flour or your loaves will become difficult to remove when it’s time to bake them.
- To shape the dough into a boule do a series of four folds: bottom to top, top to bottom, left to right and right to left. Flip over and shaping into a round. Then, gather the ball and place it seam side up in the prepared brotform, basket or bowl.
- Cover the dough loosely with a clean dish towel and allow to sit at room temp for another hour, then lightly tuck dish towel on top of the dough and place in refrigerator.
day 3: fermentation directions.
- After the dough has been in the fridge for 12 hours (or the next morning), place each of the bowls with dough in a large plastic bag to keep the dough from drying out and absorbing flavors from your refrigerator.
- After placing the loaves in the large plastic bags the loaves will remain in the fridge for another 24 hours.
baking directions.
- Place a Dutch Oven with a lid in a cold oven. Make sure your Dutch Oven can withstand high temperatures.
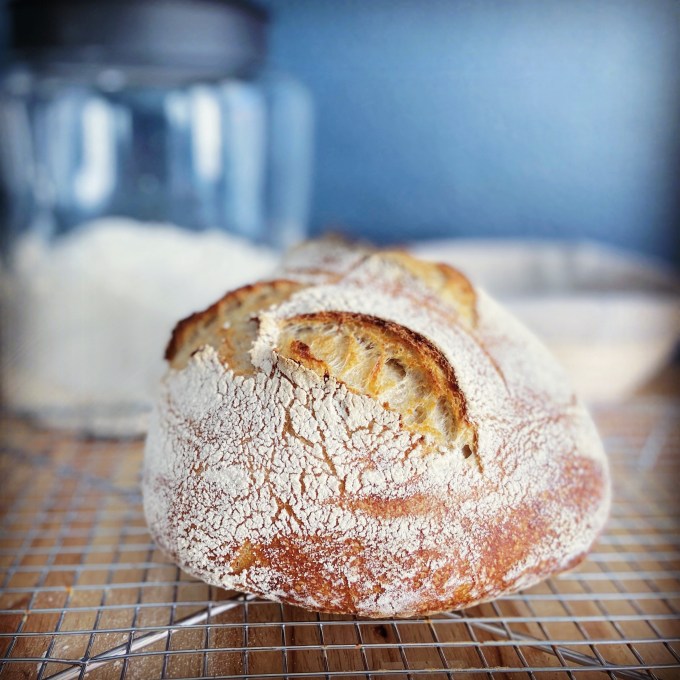
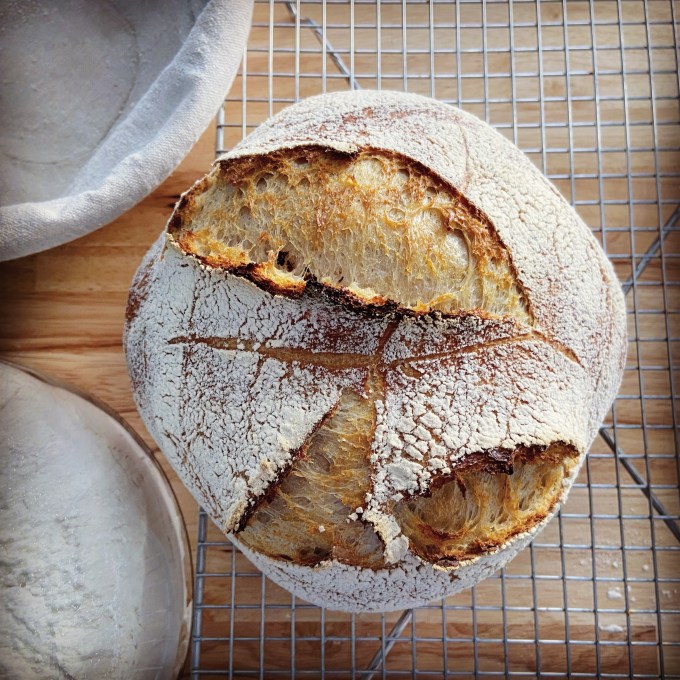
- Preheat the oven to 500ºF with your pot inside for one hour. Pull a loaf out from the refrigerator. Lightly dust with flour. The original recipe calls for rice flour here. If you don’t have it, don’t worry. Use all-purpose. I did and had no issues. Flip the loaf out onto a small cutting board. You can now score the top with a razor or lame, if desired. I always add more flour at this stage and then score with a razor or lame.
- Carefully remove the hot pot from the oven, slide the loaf into the pot, place the lid back onto the pot and place in the oven. Be very careful. The pot is very hot. There have been many times I have wanted to reach for the top of the lid without a potholder when putting the lid back on.
- Bake for 20 minutes. Carefully remove the lid, reduce the temperature to 465ºF and bake for another 10 to 15 minutes until the bread is golden brown on top. I find 10 minutes is enough. You can test for doneness with an instant read thermometer. If you put the thermometer in the middle of the loaf and it reads 190º to 210ºF then it’s fully cooked.
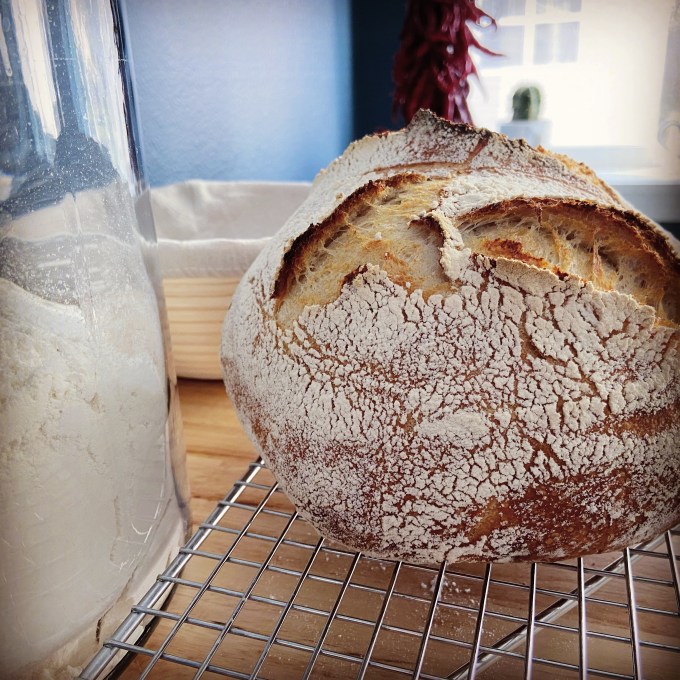
- Remove the loaf of bread from the pot and allow the bread to cool on a rack for at least one hour. The bread will continue to bake during this time.
- If immediately baking the second loaf, return the pot to the hot oven and raise the temperature back up to 500º. Let the pot heat up for 15 minutes before removing your second loaf from the refrigerator and repeating the previous process.
- You may want to purchase an inexpensive oven thermometer and place it in the back to make sure that your oven temperature is consistent and accurate. (I haven’t bothered with this, but my oven is relatively new.)
Recipe rating:


That bread looks amazing and I am very impressed! You are awesome!
LikeLike